
Understanding the Beauty of Lotus Pose
Lotus Pose looks simple from the outside. However, the truth is different. Indeed, this ancient yoga pose requires patience, practice, and a calm mind.
Many people see experienced yogis sitting in Lotus Pose and think it should be easy. In reality, this pose takes time to master. That’s perfectly okay.
The Lotus Pose is called Padmasana in Sanskrit. It has been practiced for thousands of years. Yogis use this pose for meditation because it creates a stable base.
In fact, the legs form a locked position that keeps the body still during long meditation sessions. Consequently, this stability helps the mind focus better. Furthermore, the pose promotes good posture and naturally straightens the spine.
However, rushing into Lotus Pose can cause problems. Without proper preparation, you risk knee pain and injuries. The knees are delicate joints that need respect and care.
This article will share five practical tips that help build flexibility safely. These tips come from experienced yoga teachers who understand how bodies work. Moreover, they know every person’s body is different and progress happens at different speeds for everyone.
5 Tips for Building Your Lotus Pose
Starting Your Lotus Pose Journey
Building a safe and comfortable Lotus Pose requires a step-by-step approach. The journey starts with understanding that flexibility develops gradually over weeks or sometimes months.
Indeed, yoga teachers often remind students about forcing positions because forcing the body causes harm. The goal is not to achieve the perfect pose tomorrow but rather to work steadily toward it.
These five tips work together like building blocks. Each one prepares the body for the next step.
Skipping ahead might seem tempting. However, patience pays off in the long run. When students follow these tips in order, they develop strength and flexibility in the right places. As a result, this reduces injury risk and makes the final pose more comfortable.
The tips focus on three main areas: opening the hips, stretching the legs, and training the mind.
Furthermore, hip flexibility is crucial because tight hips make Lotus Pose nearly impossible. The legs need to rotate outward from the hip joint, not twist at the knee. Understanding this difference is important for protecting the knees from strain.
Additionally, mental preparation matters just as much. Frustration and impatience work against progress. In contrast, a calm and accepting attitude helps the body relax and open naturally.
Step 1: Breathe (Seriously)
Why Breathing Matters More Than You Think
At first, breathing might seem unrelated to sitting cross-legged. However, it’s actually the foundation of the practice. Deep and steady breathing tells the body it’s safe to relax.
When people try Lotus Pose without proper breathing, their muscles tense up. Consequently, this tension makes stretching harder and more uncomfortable. The breath acts as a bridge connecting the mind and body.
Many beginners hold their breath when attempting challenging poses. This creates unnecessary stress in the muscles and joints. The body interprets breath-holding as danger and, as a response, muscles contract to protect themselves. Unfortunately, this protective response works against the flexibility needed for Lotus Pose.
How to Practice Breathing for Lotus Pose
Learning to breathe deeply during practice changes everything. Specifically, slow and controlled breaths activate the parasympathetic nervous system, which controls rest and relaxation response.
When this system activates, muscles naturally release tension and become more pliable. The hips, which often hold stress and tightness, begin to open more easily.
Practicing breathing techniques should happen first, before attempting any Lotus Pose variations. Sitting comfortably in a simple cross-legged position works well for practice.
Focus on breathing in slowly through the nose for a count of four. Then breathe out slowly through the nose for another count of four. This simple pattern calms the nervous system and prepares the body for deeper stretches.
Students who master breathing first notice that all yoga poses become easier and more enjoyable.
Step 2: Self-Acceptance (and Maybe Hero’s Pose)
Embracing Your Body’s Current State
Self-acceptance forms the mental foundation for any yoga practice. Every body has different bone structures, muscle attachments, and flexibility levels.
Some people naturally have more hip mobility because of how their hip sockets are shaped. Others need more time to develop that same mobility. Neither situation is better or worse—they’re just different.
Comparing oneself to other students in yoga class creates unnecessary frustration. The person next to you might have been practicing for years or might simply have different anatomy that allows deeper hip opening.
What matters most is personal progress rather than matching someone else. Indeed, yoga teachers emphasize that the practice is personal and individual.
Getting Started with Hero’s Pose
Hero’s Pose, called Virasana, offers a gentler starting point for many practitioners. This pose involves kneeling with the knees together, then sitting back between the heels.
Hero’s Pose stretches the thighs and ankles while being much more accessible than Lotus Pose. Some people find it comfortable right away, while others need blankets or blocks for support.
Practicing Hero’s Pose regularly builds flexibility in the legs and ankles. It also teaches the habit of sitting still with good posture. These skills transfer directly to Lotus Pose later.
Students should hold Hero’s Pose for several minutes while practicing deep breathing. This combination creates both physical and mental preparation.
If Hero’s Pose causes knee pain, use props like yoga blocks or folded blankets for support. The key is finding a position that feels challenging but not painful.
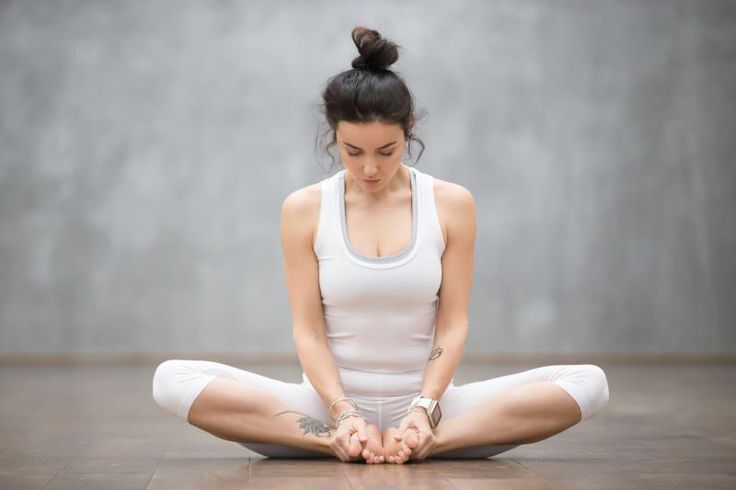
Step 3: Bound Angle Pose
Opening the Hips with Bound Angle Pose
Next, Bound Angle Pose (known as Baddha Konasana) directly targets hip flexibility. This pose looks simple but provides powerful benefits for Lotus Pose preparation.
To practice it, sit on the floor with your legs extended forward. Bend both knees and bring the soles of the feet together. Let the knees fall out to the sides while holding the feet with both hands.
This position creates a diamond shape with the legs. The hips naturally resist at first, especially for people who sit in chairs most of the day.
Modern lifestyles keep the hips closed for hours, creating tightness in the hip muscles and connective tissues. Fortunately, Bound Angle Pose reverses this gently over time.
Key Points for Safe Practice
The key to practicing Bound Angle Pose safely involves several important points. Keep the spine straight and tall—don’t round forward. Let gravity do the work instead of pushing the knees down with force.
Hold the pose for at least one minute to allow muscles to release naturally. Breathe deeply throughout the entire hold. Practice this pose daily for best results.
Some students feel frustrated when their knees stay high off the floor. This is completely normal and expected because hip flexibility develops slowly, often taking months of consistent practice.
Using yoga blocks or folded blankets under the knees provides support and reduces strain. As flexibility increases, the props can gradually be removed.
Making Progress in Bound Angle Pose
Leaning forward slightly deepens the hip stretch in Bound Angle Pose. However, maintaining a straight spine matters more than how far forward the body bends.
A rounded back shifts the stretch away from the hips and into the lower back, which defeats the purpose of the pose.
Students should imagine a string pulling the top of the head toward the ceiling. This mental image helps lengthen the spine properly.
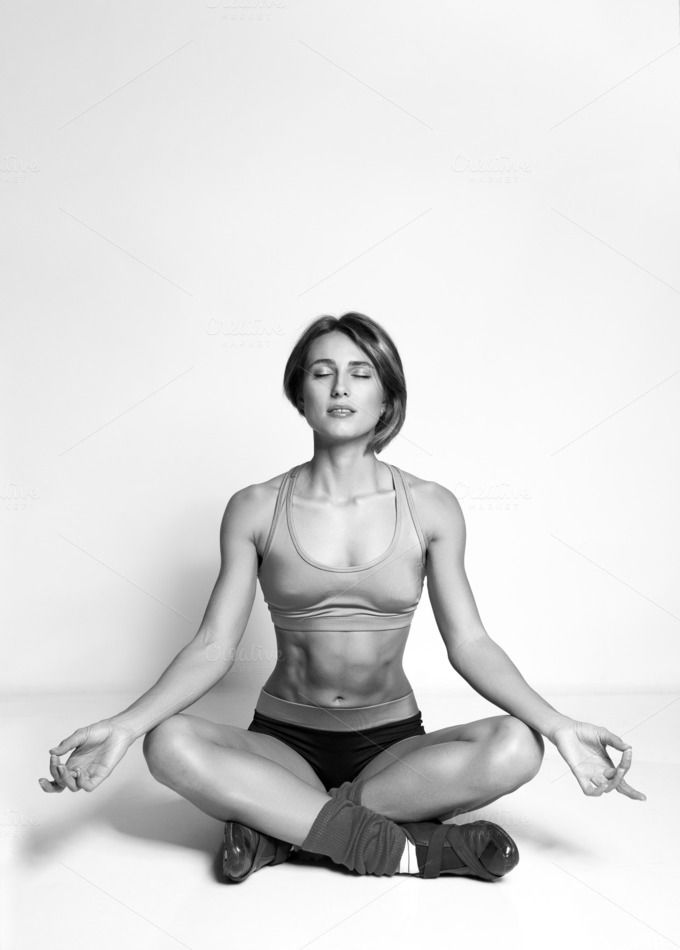
Step 4: Half Lotus Pose
Taking the Next Step with Half Lotus
Half Lotus Pose serves as a bridge between basic hip openers and full Lotus Pose. This intermediate position uses one leg in a lotus position while keeping the other leg simpler.
Half Lotus allows practitioners to experience the rotation and placement required for Lotus Pose. Importantly, it doesn’t overwhelm both hips at once.
To practice Half Lotus, start sitting with legs extended forward. Bend the right knee and place the right foot on the floor near the right hip. Then carefully bend the left knee and bring the left foot toward the body.
Lift the left foot and place it on top of the right thigh, positioned close to the hip crease. The left knee should point toward the floor or to the side.
Understanding Hip Rotation in Half Lotus
This position might feel strange or uncomfortable at first. The hip joint needs to rotate externally for the foot to rest on the opposite thigh. Importantly, this rotation should come from deep within the hip socket, not from twisting the knee.
The knee joint only bends in one direction and doesn’t rotate much. Therefore, forcing rotation at the knee causes pain and potential injury.
Students should practice Half Lotus on both sides to develop balanced flexibility. Spending equal time with each leg in the lotus position prevents the body from developing unevenly.
Most people have one hip that’s more flexible than the other—this is normal and expected. The tighter hip might need extra attention and practice time.
Holding Half Lotus for several minutes helps the body adapt to the position. During this time, focus on breathing deeply and relaxing the hip muscles.
Any sharp pain signals the need to back off immediately. However, a stretching sensation or mild discomfort usually indicates the muscles are working properly.
Learning to distinguish between good stretch and harmful pain takes practice and body awareness.
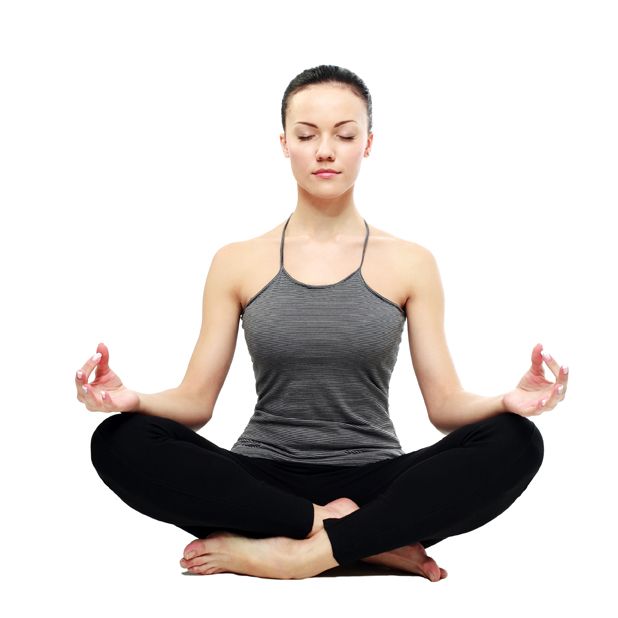
Step 5: Full Lotus Pose
Achieving Full Lotus Safely
Finally, Full Lotus Pose represents the culmination of all previous preparation work. This pose requires both hips to rotate externally with both feet resting on the opposite thighs.
The position creates a stable and locked base that yogis have used for meditation for centuries. However, rushing into Full Lotus before the body is ready causes knee problems and frustration.
To attempt Full Lotus, start by sitting on the floor with legs extended forward. Bend the right knee and carefully bring the right foot up onto the left thigh. The foot should rest high on the thigh, close to the hip crease.
Then bend the left knee and bring the left foot up onto the right thigh. Both feet should rest comfortably on the opposite thighs with the soles facing upward.
When done correctly, Full Lotus feels stable and sustainable. The knees should touch the floor or come close to it, and both hips should feel open without strain.
The spine naturally straightens in this position, making it ideal for meditation. However, many people need months or even years of practice before Full Lotus becomes comfortable.
Safety Guidelines for Full Lotus
Several key points ensure safe practice of Full Lotus. Never force the legs into position if the hips resist. Keep the movements slow and controlled.
Stop immediately if any knee pain occurs. Use cushions under the hips to elevate the pelvis. Hold the pose only as long as it remains comfortable, and exit carefully by gently releasing one leg at a time.
Some practitioners discover that Full Lotus isn’t appropriate for their body structure. Variations exist in hip socket depth and angle that affect how far the legs can rotate.
This anatomical variation is completely normal. Alternative meditation poses like Easy Pose or Half Lotus work perfectly well for meditation and breathing practices.
The goal of yoga is not to force the body into specific shapes. Rather, it’s about finding what works best for each individual.
About the Teacher
Lauren Beth Jacobs
Lauren Beth Jacobs brings years of yoga teaching experience to students worldwide. She understands the challenges that beginners face when approaching difficult poses like Lotus Pose.
Her teaching style emphasizes patience, safety, and individual progress while avoiding competition and perfection.
Lauren’s approach comes from personal experience with the journey. She remembers struggling with hip flexibility when she first started practicing yoga. Through consistent practice and proper technique, she developed the openness needed for comfortable Lotus Pose.
Now she helps others navigate the same path by providing clear instructions and realistic expectations.
Her teaching philosophy centers on respecting the body’s limits while gently expanding them. She encourages students to celebrate small victories along the way.
Perhaps the knees lower an inch in Bound Angle Pose, or Half Lotus becomes comfortable for a few minutes. These incremental improvements matter just as much as achieving the final pose.
Lauren reminds students that yoga is a lifelong practice, not a destination to reach quickly.
Trending Member Content
This Week’s Trending Practices
Yoga studios and online platforms track which practices attract the most student interest. Trending practices often reflect seasonal interests and current wellness trends.
However, foundational practices like Lotus Pose preparation remain popular year-round because they address universal needs for flexibility and meditation skills.
Trending Yoga Class: Hip-Opening Yoga
Hip-opening yoga classes consistently rank high among the most popular offerings. These classes focus specifically on poses that stretch and strengthen the muscles around the hips.
Students often request these classes because modern lifestyles create tight hips. Office workers, drivers, and anyone who sits frequently benefits from targeted hip work.
Classes that build toward Lotus Pose attract students interested in meditation. These classes typically combine breathing exercises, gentle warm-ups, and progressive hip openers.
The instructor guides students through the five-step process outlined in this article. Each class builds on previous sessions. As a result, this allows students to track their progress over time.
Trending Meditation Class
Meditation classes teach students how to sit comfortably for extended periods. While Lotus Pose is traditional, instructors always offer alternatives for students who need them.
The focus stays on mental stillness rather than physical accomplishment. Students learn breathing techniques, visualization methods, and ways to work with distracting thoughts.
Many meditation classes begin with gentle yoga stretches to prepare the body for sitting. The stretches might include Bound Angle Pose, Cat-Cow stretches, or gentle hip circles.
The movement warms up the body and releases surface tension. Consequently, this preparation allows students to sit more comfortably during the meditation portion of the class.
Trending Breathwork Class
Breathwork classes dive deeply into the connection between breathing and nervous system regulation. Students learn various breathing patterns and their effects on the body and mind.
Some patterns energize and invigorate, while others calm and relax. Understanding these different techniques helps students choose the right breath for their current needs.
The breathing techniques learned apply directly to yoga practice. When attempting Lotus Pose or any challenging position, proper breathing reduces perceived difficulty.
The breath acts as a tool for managing discomfort and encouraging muscular release. Students who attend both breathwork and yoga classes often progress faster because they understand this crucial connection.
Additional Benefits of Lotus Pose Practice
Physical Health Improvements
Regular practice of Lotus Pose and its preparatory exercises creates numerous physical benefits. The hips become more mobile and flexible over time.
This increased mobility helps with many daily activities beyond yoga. Getting up from the floor becomes easier, playing with children becomes easier, and maintaining good posture becomes easier.
The pose also strengthens muscles that support the spine. The back muscles, core, and deep hip stabilizers all engage to maintain the upright position.
This strengthening happens gradually and naturally without the need for intense exercise. The result is better posture throughout the day, even when not practicing yoga.
Ankle flexibility improves through consistent practice of preparatory poses like Hero’s Pose. This flexibility reduces the risk of ankle sprains during daily activities.
The feet also become stronger, which benefits balance and overall stability. Many students notice their walking and standing posture improves as their practice deepens.
Mental and Emotional Benefits
The mental benefits often exceed the physical ones when working toward Lotus Pose. The practice teaches patience in a world that constantly demands immediate results.
Students learn to appreciate slow progress and trust the process. This lesson extends far beyond the yoga mat into daily life.
Frustration tolerance increases as students work with their body’s limitations. There will be days when the hips feel tight and progress seems impossible. Other days bring breakthrough moments of increased openness and comfort.
Learning to accept both types of days builds emotional resilience. This resilience helps handle life’s inevitable ups and downs with more grace.
The meditative aspect of holding poses develops concentration and mental focus. The mind naturally wanders during long holds, and students practice gently bringing attention back to the breath.
This skill of redirecting attention proves valuable in many situations. Students report better focus at work, improved listening skills, and reduced mental chatter.
Spiritual and Energetic Aspects
Traditional yoga philosophy views Lotus Pose as more than a physical position. The locked legs create a seal that some practitioners believe contains energy within the body.
This contained energy can be directed upward through the spine during meditation. While scientific evidence is limited, many practitioners report feeling something special about the pose.
The symmetry and balance of Lotus Pose represents inner harmony in yogic tradition. The equal positioning of both legs symbolizes balance between different aspects of life.
Active and restful, strong and flexible, doing and being—all find representation in the pose’s structure. This symbolism adds depth to the practice, especially for students interested in yoga philosophy.
Common Mistakes to Avoid
Rushing the Process
The most common mistake students make is rushing toward Full Lotus before their bodies are ready. This eagerness often comes from comparing themselves to others or misunderstanding yoga’s purpose.
Forcing the body into positions it’s not ready for causes injuries that can take months to heal. Knee problems in particular can become chronic if proper caution isn’t exercised.
Students should spend weeks or months on each preparatory step. Some bodies need even longer, and that’s perfectly acceptable. The preparation time isn’t wasted—it builds a strong foundation for safe practice.
Teachers can assess readiness better than students themselves. Therefore, asking for guidance prevents premature progression.
Ignoring Pain Signals
Sharp pain always signals that the body is saying “stop immediately.” This type of pain differs completely from the stretching sensation of muscles lengthening.
Sharp pain often indicates joint stress or that tissue damage is beginning to occur. Ignoring these signals leads to injuries that could have been prevented.
Learning to distinguish between discomfort and pain takes practice and honest self-assessment. Discomfort feels like stretching, pulling, or mild burning in the muscles—it’s manageable and doesn’t cause fear or panic.
Pain feels sharp, shooting, or stabbing and creates an immediate desire to exit the position. When in doubt, students should always err on the side of caution and back off.
Neglecting the Breath
Holding the breath or breathing shallowly undermines the entire practice. Proper breathing provides the key to muscular release and mental calmness.
Without it, poses become battles of willpower against tight muscles. With it, poses transform into opportunities for growth and exploration.
Students should check in regularly with their breathing during practice. If the breath becomes rapid, shallow, or held, it’s time to ease up.
The breath should remain smooth, deep, and comfortable throughout the entire practice. This steady breathing indicates that the nervous system remains calm and the body can safely stretch.
Skipping the Warm-Up
Attempting Lotus Pose or its variations without warm-up increases injury risk. Cold muscles and connective tissues don’t stretch as easily as warm ones.
A good warm-up includes gentle movement that increases blood flow to the hips and legs. This might include walking, light cardio, or dynamic yoga movements.
Hip circles, knee circles, and ankle rotations make excellent warm-up exercises. These movements lubricate the joints and wake up the surrounding muscles.
Spending five to ten minutes on warm-up exercises makes the subsequent stretching more comfortable and effective. Students who skip warm-ups often struggle more and risk injury.
Creating a Regular Practice Routine
Establishing Daily Practice
Consistency matters more than intensity when building flexibility for Lotus Pose. Practicing for ten minutes every day produces better results than occasional longer sessions.
Daily practice keeps the muscles and connective tissues pliable. It also builds the mental habit of showing up on the mat regularly.
Morning practice works well for many people because the body is rested and the day hasn’t brought stress yet. However, evening practice can also be beneficial for releasing accumulated tension.
The best practice time is whenever a student can maintain consistency. Some people practice during lunch breaks, while others prefer bedtime routines.
A simple daily routine might include five minutes of breathing exercises to center the mind, three minutes of gentle warm-up movements, five minutes of Bound Angle Pose, two minutes of Half Lotus on each side, and five minutes of meditation in a comfortable seated position.
This twenty-minute routine covers all the essential elements without overwhelming busy schedules. As students progress, they can adjust the timing of each component. Perhaps Half Lotus extends to five minutes per side, or meditation lengthens to ten minutes.
Tracking Progress
Keeping a practice journal helps students notice improvements that happen gradually. Flexibility changes slowly, making progress hard to perceive day-to-day.
However, comparing notes from weeks or months ago reveals significant changes. The journal might record how long each pose was held, how comfortably it was held, and any new sensations.
Photos taken monthly document progress effectively. A photo of Bound Angle Pose each month shows how the knees gradually lower toward the floor.
These visual records provide motivation during plateaus when progress seems to stall. They remind students that change is happening, even when it’s not immediately obvious.
Celebrating small victories maintains motivation throughout the journey. Maybe the right hip opened significantly this week, or breathing remained calm during a challenging hold.
These achievements deserve recognition and appreciation. Yoga practice isn’t about reaching a final destination but rather enjoying the journey of self-discovery and growth.
Conclusion
Building a safe and comfortable Lotus Pose requires patience, consistent practice, and respect for the body’s individual needs.
The five tips outlined in this article provide a proven pathway that protects the knees while developing necessary hip flexibility. Starting with proper breathing creates the foundation for all subsequent work.
Self-acceptance prevents frustration and allows natural progress to unfold.
The progression from Bound Angle Pose through Half Lotus to Full Lotus gives the body time to adapt gradually. Each step prepares specific muscles and joints for the next challenge.
Rushing through these steps leads to injuries and setbacks that delay the ultimate goal. Students who follow the five-step process with patience discover that their practice becomes enjoyable rather than frustrating.
Remember that Full Lotus Pose isn’t the only valid meditation posture. Many accomplished meditators use alternatives that work better for their body structure.
The goal of yoga is union between body, mind, and spirit—not achievement of specific shapes. Whatever pose allows comfortable and stable sitting for meditation serves the practice’s true purpose.
Consistent daily practice, even for just a few minutes, produces better results than occasional intensive sessions. The body adapts more effectively to regular, gentle challenges than to sporadic extreme efforts.
Students should approach their practice with curiosity and kindness, not judgment or force. This attitude creates sustainable progress that continues for years.
Frequently Asked Questions
How long does it take to achieve Lotus Pose?
The timeline varies greatly between individuals. Some people with naturally flexible hips might accomplish it in a few months, while others with tighter hips or different bone structure might need a year or more.
A few people discover that their anatomy simply doesn’t allow Full Lotus, and that’s completely okay. The important factor is consistent daily practice rather than rushing toward a specific deadline.
Students should focus on gradual improvement instead of comparing themselves to others or setting arbitrary time goals.
Can Lotus Pose damage my knees?
Lotus Pose can definitely cause knee problems if practiced incorrectly or prematurely. The knee joint is designed to bend in one direction and has limited rotation capacity.
All the rotation needed must come from the hip joint. When students force their legs into Lotus Position before the hips are flexible enough, the stress transfers to the knees.
This can cause meniscus tears, ligament damage, and chronic pain. Following the five-step progression and never forcing the pose protects the knees from injury.
What if I can never do Full Lotus?
Many experienced yogis and meditators never practice Full Lotus Pose due to their individual anatomy. Hip socket depth, the angle of the femur bone, and other structural factors affect whether Full Lotus is possible.
This limitation doesn’t make someone less capable as a yogi or meditator. Half Lotus, Easy Pose, or sitting on a meditation bench work well for meditation practice.
The most important aspect is the comfort and sustainability of any seated pose, not achieving a specific shape.
Should I practice Lotus Pose if I have hip or knee problems?
People with existing injuries should consult a healthcare provider before attempting Lotus Pose. Some conditions improve with gentle hip opening work, while others require complete avoidance of external hip rotation.
A physical therapist or experienced yoga therapist can assess individual situations and provide personalized guidance. They might suggest modifications or alternative poses that provide benefits without aggravating existing conditions.
Safety always takes priority over achieving any particular pose.
How do I know if I’m ready to progress to the next step?
Readiness for progression shows up in several ways. The current step should feel comfortable and sustainable for at least five minutes.
There should be no knee pain during or after practice. The hips should feel open rather than restricted in the current pose.
Many teachers recommend waiting until these conditions are met before advancing. Working with an experienced yoga instructor provides valuable feedback about readiness.
They can observe the body’s alignment and suggest the right timing for progression. Patience during each stage prevents injuries and builds a strong foundation.